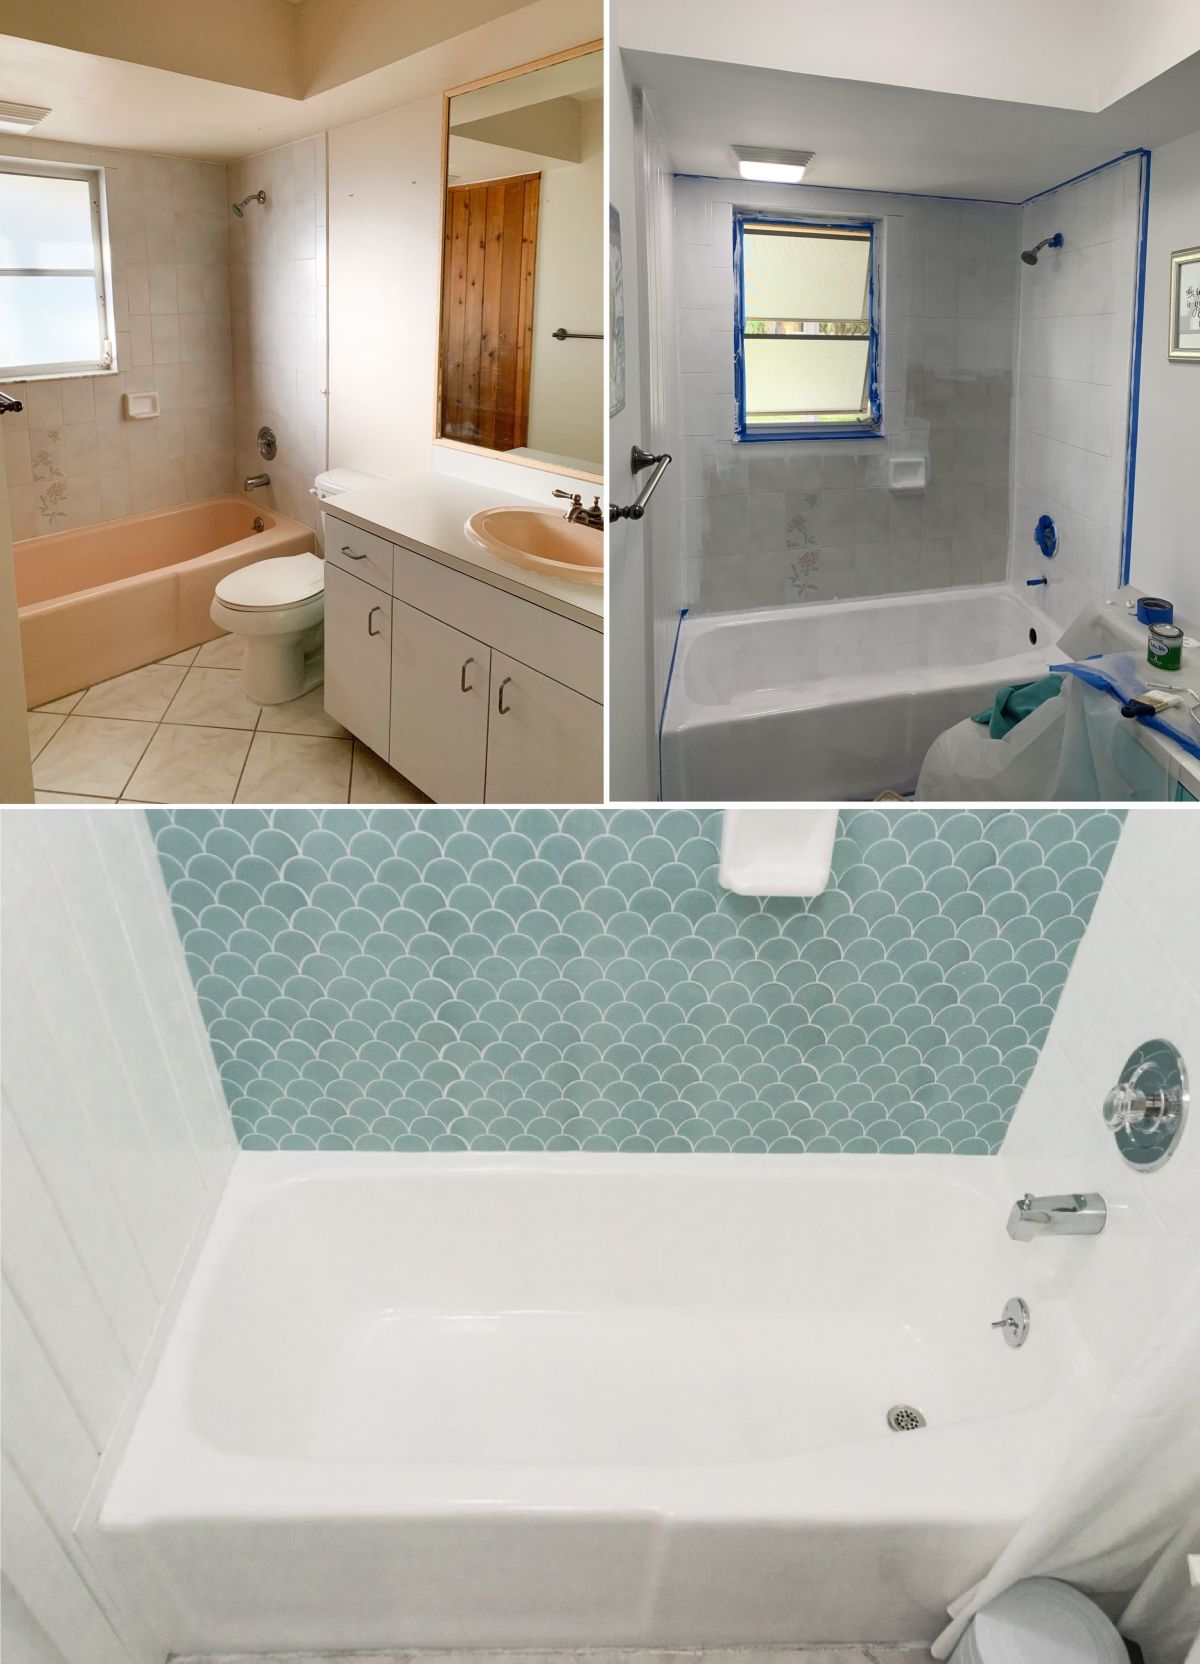
Introduction: Transforming Your Bathtub with Paint
Revamping your bathroom doesn’t always require a costly renovation. Sometimes, a fresh coat of paint can work wonders, especially when it comes to rejuvenating an old, worn-out bathtub. In this comprehensive guide, we’ll explore tips and techniques for painting your bathtub like a pro, turning it into a stunning focal point that revitalizes your entire bathroom space.
Choosing the Right Paint: Key Considerations
Before diving into your bathtub painting project, it’s essential to select the right type of paint. Look for a high-quality epoxy or enamel paint specifically formulated for use on bathtubs and tiles. These paints are designed to withstand moisture, heat, and frequent cleaning, ensuring long-lasting results. Additionally, consider the color and finish options available, opting for a shade that complements your bathroom decor and personal style.
Preparation is Key: Proper Surface Prep
Achieving professional-looking results begins with thorough surface preparation. Start by cleaning the bathtub thoroughly to remove any soap scum, mineral deposits, and grime. Use a heavy-duty cleaner or abrasive scrubbing pad to ensure the surface is completely clean and free of residue. Next, sand the bathtub surface with fine-grit sandpaper to roughen the surface and promote paint adhesion. Finally, use a solvent-based cleaner to remove any remaining debris and grease, ensuring a smooth and clean surface for painting.

Masking and Protecting Surrounding Areas
To avoid accidental paint splatters and overspray, it’s crucial to mask and protect surrounding areas before painting your bathtub. Use painter’s tape to cover any fixtures, hardware, and surfaces that you don’t want to be painted, such as the faucet, drain, and walls. Additionally, lay down drop cloths or plastic sheeting to protect the floor and surrounding surfaces from drips and spills. Taking the time to properly mask and protect these areas will save you time and effort in cleanup later on.
Applying Primer for Adhesion
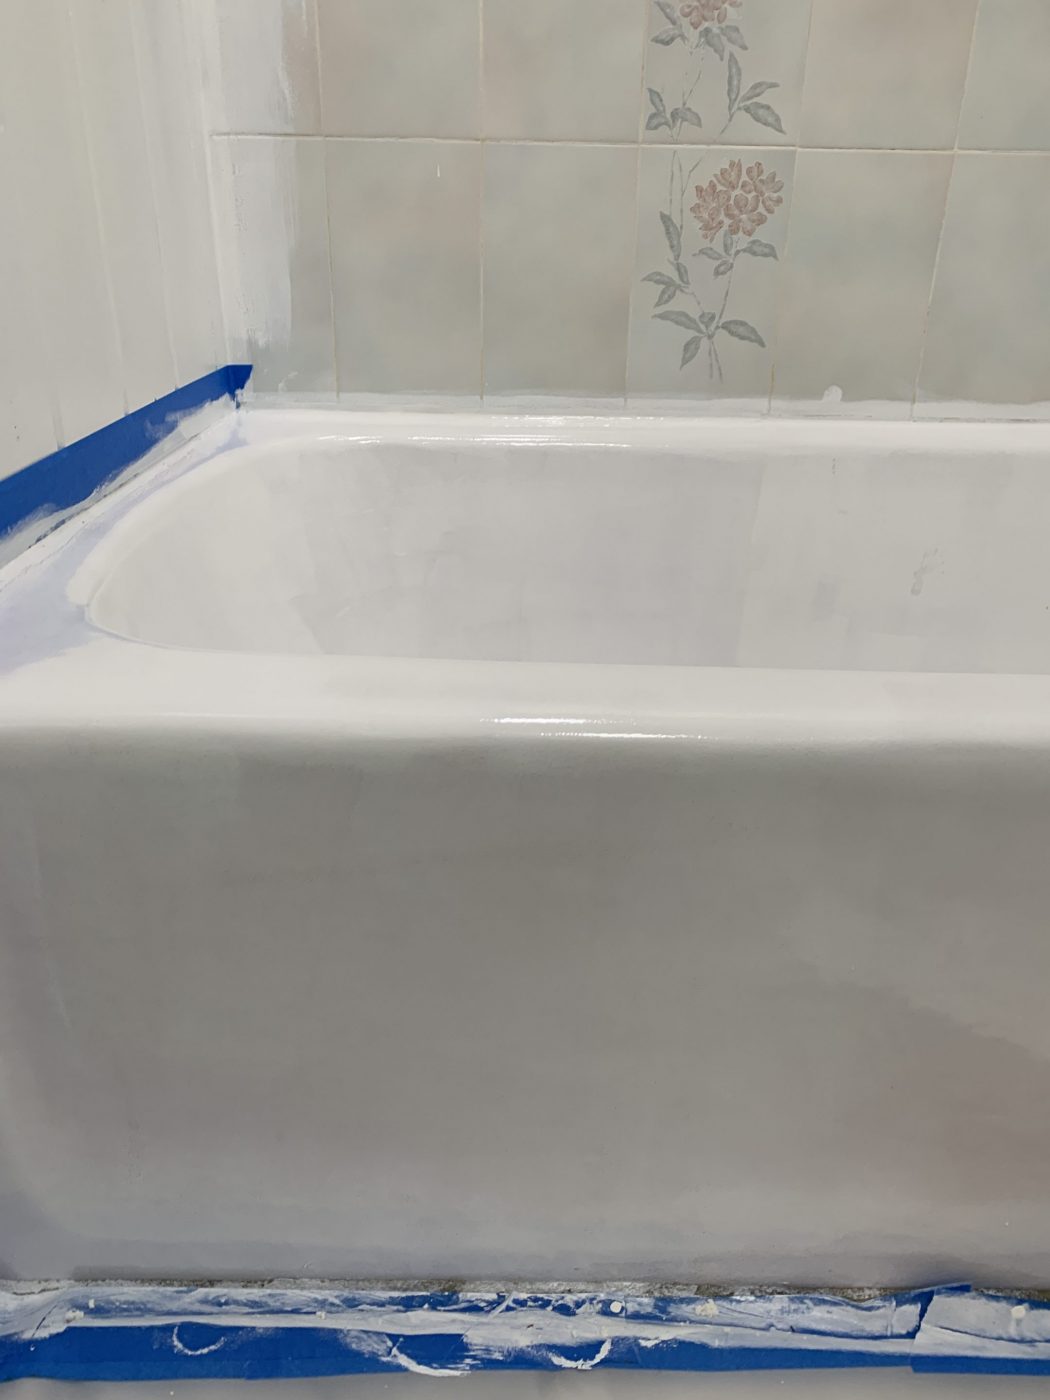
Applying a high-quality primer is essential for promoting adhesion and ensuring long-lasting results when painting a bathtub. Choose a primer specifically formulated for use on porcelain, ceramic, or enamel surfaces, and apply it evenly to the entire bathtub surface using a paintbrush or roller. Allow the primer to dry completely according to the manufacturer’s instructions before proceeding to the next step. A well-applied primer will create a smooth and stable base for the topcoat of paint, enhancing durability and resistance to chipping and peeling.
Selecting the Right Painting Technique
When it comes to painting your bathtub, there are several techniques you can use to achieve professional-looking results. Consider using a high-volume, low-pressure (HVLP) spray gun for a smooth and even application of paint. Alternatively, you can use a high-quality synthetic brush or foam roller to apply paint in thin, even coats. Whichever technique you choose, be sure to work methodically and evenly, avoiding drips, runs, and streaks. Take your time and allow each coat of paint to dry thoroughly before applying the next layer for best results.
Achieving Even Coverage with Multiple Coats
To achieve a flawless finish, it’s essential to apply multiple thin coats of paint rather than a single thick coat. Start by applying a base coat of paint evenly across the entire bathtub surface, allowing it to dry completely. Then, apply additional coats as needed to achieve the desired level of coverage and depth of color. Be sure to sand lightly between coats to promote adhesion and smooth out any imperfections. Building up the paint gradually will result in a more durable and professional-looking finish that stands the test of time.
Finishing Touches: Sealing and Protecting the Surface
Once you’ve applied the final coat of paint and allowed it to dry thoroughly, it’s time to seal and protect the surface to ensure long-lasting results. Consider applying a clear topcoat or sealer specifically formulated for use on painted bathtub surfaces. This protective layer will help seal in the paint and provide an additional barrier against moisture, stains, and abrasion. Follow the manufacturer’s instructions for application and drying times to achieve optimal results.

Curing and Maintenance: Ensuring Durability
After completing the painting process, it’s essential to allow the bathtub surface to cure fully before using it. Follow the manufacturer’s recommended curing time, typically ranging from 24 to 72 hours, to ensure that the paint fully hardens and adheres to the surface. Once cured, maintain the painted bathtub surface by cleaning it regularly with mild, non-abrasive cleaners and avoiding harsh chemicals and abrasive scrubbers. With proper care and maintenance, your freshly painted bathtub can maintain its beauty and durability for years to come.
Maintenance and Longevity: Preserving Your Bathtub’s Beauty
Ensuring the longevity of your newly painted bathtub involves more than just the initial application process. Proper maintenance and care are key to preserving its beauty and durability over time. Here are some essential tips for maintaining your bathtub’s freshly painted surface:
1. Gentle Cleaning: Avoid harsh chemicals and abrasive cleaners that can damage the painted surface. Instead, opt for mild, non-abrasive cleaners and soft sponges or cloths to gently clean the bathtub.
2. Regular Maintenance: Make it a habit to clean your bathtub regularly to prevent dirt, grime, and soap scum buildup. Regular maintenance will not only keep your bathtub looking its best but also extend its lifespan.
3. Avoiding Scratches and Abrasions: Be mindful of sharp objects and abrasive materials that can scratch or chip the painted surface. Use caution when handling bath accessories, such as shower caddies and soap dishes, to prevent accidental damage.
4. Repairing Chips and Imperfections: Despite your best efforts, chips or imperfections may occur over time. Promptly repair any damage to the painted surface using touch-up paint or a clear sealant to prevent further deterioration.
Conclusion: Transforming Your Bathroom with Paint
Revamping your bathroom doesn’t have to be a daunting or expensive task. With the right techniques and materials, painting your bathtub can be a cost-effective and rewarding DIY project that revitalizes your entire space. By choosing the right paint, properly preparing the surface, and applying multiple thin coats, you can achieve professional-looking results that enhance the beauty and functionality of your bathroom. With a little time and effort, you can transform your bathtub into a stunning focal point that adds style and sophistication to your home.