
Updating your bathroom often involves removing old, worn-out tiles to make way for fresh, modern ones. While this task may seem daunting, especially for those unfamiliar with the process, there are several effective methods to remove bathroom tiles without causing extensive damage to the underlying surfaces. In this comprehensive guide, we’ll explore various techniques and considerations for safely and efficiently removing bathroom tiles to revamp your space.
Assessing the Situation: Preparation and Safety Measures
Before diving into tile removal, it’s essential to assess the condition of your bathroom and take necessary precautions to ensure a safe and efficient process.
- Preparation: Clear the area around the tiles to create a workspace free of obstacles. Remove any fixtures, such as towel bars or toilet paper holders, that may interfere with the removal process. Additionally, cover nearby surfaces and fixtures with protective materials to prevent damage.
- Safety Measures: Wear appropriate safety gear, including gloves, safety glasses, and a dust mask, to protect yourself from potential hazards such as sharp tile shards and dust inhalation. Ensure adequate ventilation in the bathroom to minimize exposure to dust and fumes generated during tile removal.
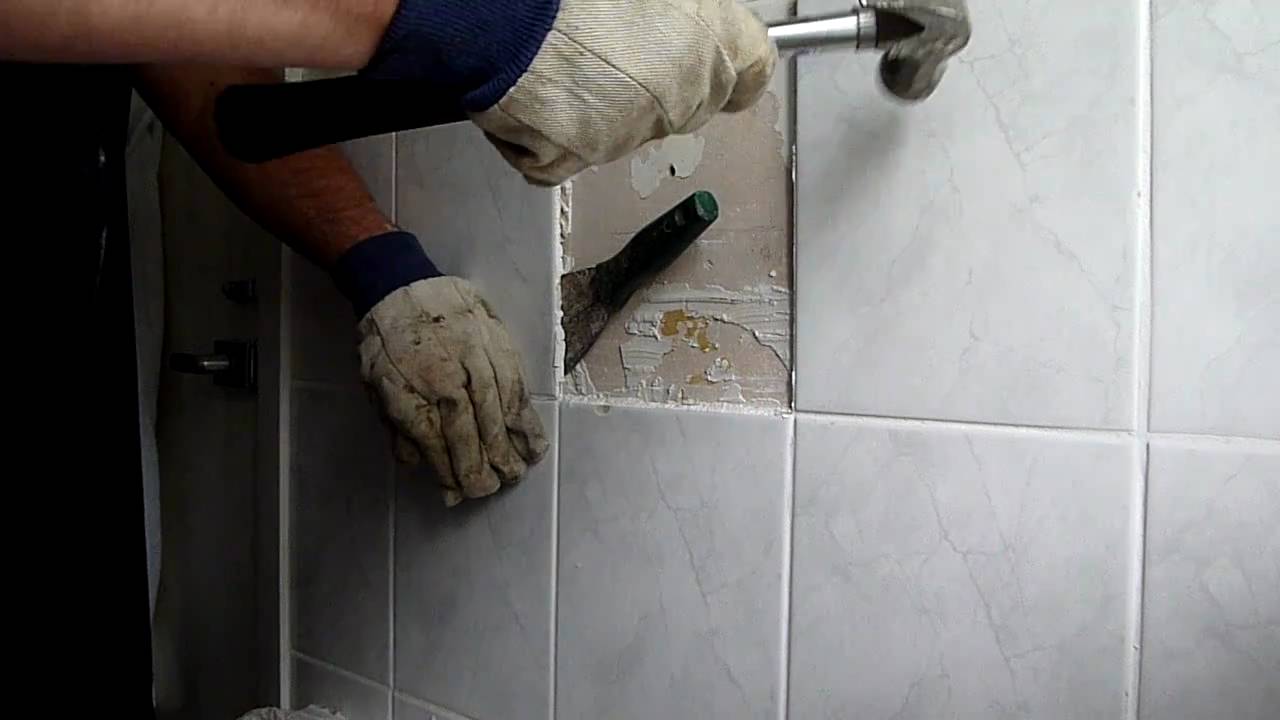
Method 1: Manual Tile Removal
Manual tile removal involves using hand tools to pry tiles from the surface, making it suitable for smaller areas or individual tiles that need replacing.
- Tools Needed: Gather essential tools such as a hammer, chisel, pry bar, and putty knife. These tools will help loosen and remove tiles without causing significant damage to the underlying substrate.
- Technique: Starting from an edge or corner, use the chisel and hammer to gently tap and pry the tiles away from the surface. Work systematically, moving across the area to loosen each tile gradually. Use the putty knife to scrape away any adhesive or grout residue left behind.
- Considerations: Exercise caution to avoid damaging the underlying substrate, such as drywall or cement board. Take your time and work patiently to minimize the risk of accidental damage.
Method 2: Tile Removal Using Power Tools
For larger areas or stubborn tile installations, power tools can expedite the removal process, saving time and effort.
- Tools Needed: Rent or purchase a rotary hammer or demolition hammer equipped with a chisel attachment. These powerful tools are designed to break through tile and mortar quickly and efficiently.
- Technique: With the rotary hammer set to the chiseling mode, carefully position the chisel tip against a tile and apply gentle pressure to break it free from the surface. Work systematically, moving across the area in a grid pattern to remove tiles effectively. Use caution to avoid damaging surrounding tiles or surfaces.
- Considerations: Power tools can generate significant noise, dust, and vibration during operation. Wear ear protection and ensure proper ventilation to minimize discomfort and exposure to airborne particles.
Method 3: Tile Removal with Heat
Heat can be an effective method for softening adhesive and grout, making tile removal easier and less labor-intensive.
- Tools Needed: Obtain a heat gun or infrared tile remover, both of which are designed to generate heat and soften adhesive without damaging surrounding materials.
- Technique: Apply heat evenly to the surface of the tiles, focusing on small sections at a time. Once the adhesive softens, use a putty knife or scraper to pry the tiles away from the surface gently. Repeat the process as needed until all tiles are removed.
- Considerations: Exercise caution when using heat tools to avoid burns or damage to nearby surfaces. Keep the heat gun or infrared remover moving to prevent overheating and potential damage to the substrate.
Method 4: Chemical Tile Removers
Chemical tile removers can dissolve adhesive and grout, facilitating easier tile removal with minimal manual effort.
- Products: Choose a commercial adhesive remover or solvent specifically formulated for tile removal. These products typically contain chemicals such as methylene chloride or citrus-based solvents.
- Application: Follow the manufacturer’s instructions for application and safety precautions. Apply the chemical remover to the surface of the tiles, allowing it to penetrate and soften the adhesive. Once softened, use a putty knife or scraper to pry the tiles away from the surface.
- Considerations: Chemical removers can emit strong fumes and may require adequate ventilation or respiratory protection. Avoid prolonged skin contact and follow safety guidelines to minimize exposure to harmful chemicals.
Conclusion
Revamping your bathroom by removing old tiles is a rewarding endeavor that can breathe new life into your space. Whether you choose manual methods, power tools, heat, or chemical removers, proper preparation and safety precautions are essential for a successful tile removal project. Assess the scope of the task, select the appropriate tools and techniques, and work diligently to achieve the desired results. With careful planning and execution, you can transform your bathroom into a fresh, modern oasis that reflects your personal style and aesthetic preferences.