
Installing an exhaust fan in your bathroom is essential for maintaining a healthy and comfortable environment. Excess moisture from showers can lead to mold, mildew, and unpleasant odors. A well-ventilated bathroom helps prevent these issues while improving air quality. This step-by-step guide will walk you through the installation process, ensuring you have everything you need for a successful project.
Understanding the Importance of Bathroom Ventilation
Why You Need an Exhaust Fan
Bathroom ventilation is crucial for several reasons. Firstly, bathrooms are typically small, enclosed spaces that trap steam and humidity from hot showers and baths. Without proper ventilation, this moisture can accumulate, leading to a range of problems, including mold growth, damage to paint and fixtures, and unpleasant odors. An exhaust fan helps to expel this excess moisture, maintaining a healthier environment.
Benefits of Installing an Exhaust Fan
In addition to reducing humidity, an exhaust fan offers other benefits. It improves indoor air quality by removing odors and airborne pollutants, ensuring that your bathroom remains fresh. It also helps to prevent structural damage to your home by reducing moisture levels, which can cause wood rot and damage to drywall. Ultimately, investing in a good exhaust fan is a wise choice for both comfort and long-term home maintenance.
Choosing the Right Exhaust Fan
Factors to Consider When Selecting an Exhaust Fan
Before installing an exhaust fan, it’s essential to choose the right model for your bathroom. Several factors come into play, including the size of your bathroom, the fan’s noise level, and its airflow capacity measured in cubic feet per minute (CFM). For effective ventilation, you should aim for a fan that can move at least 1 CFM per square foot of bathroom space.
Types of Exhaust Fans
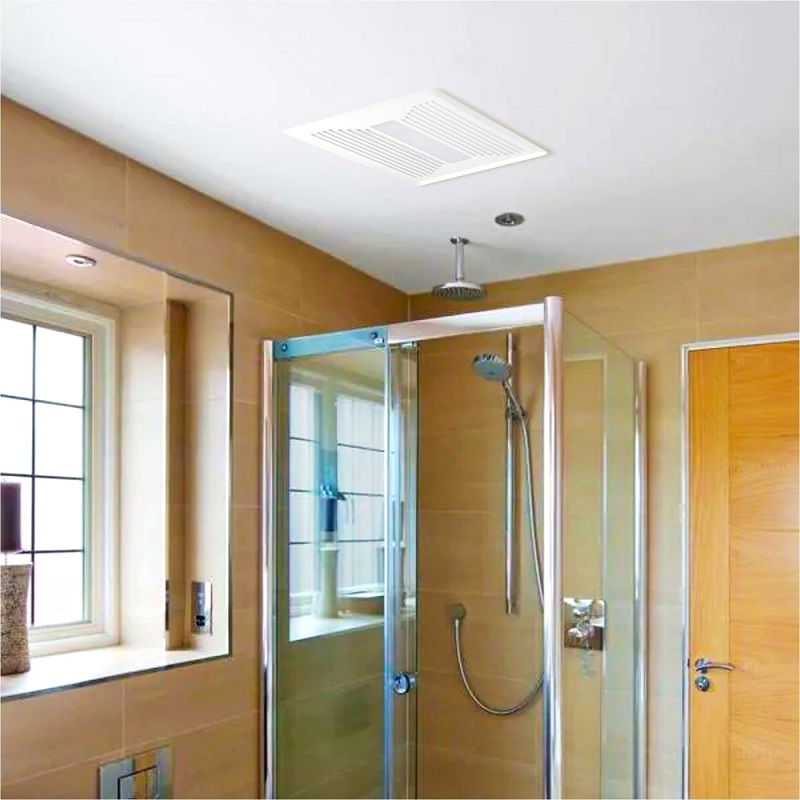
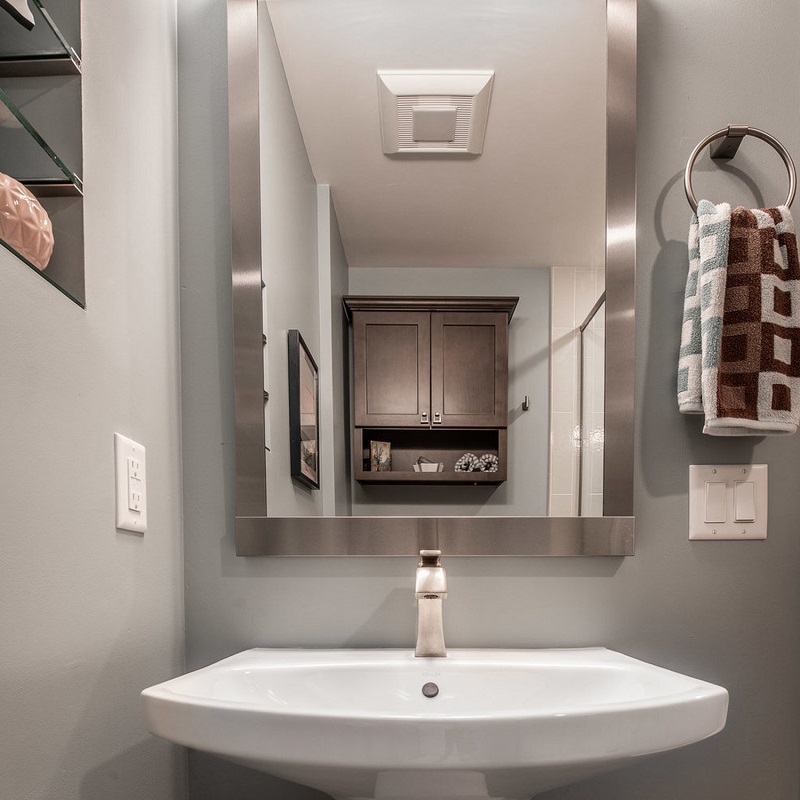
There are various types of exhaust fans available on the market, including ceiling-mounted, wall-mounted, and inline fans. Ceiling-mounted fans are the most common choice for bathrooms due to their unobtrusive design and efficient operation. Wall-mounted fans can be a good option if ceiling installation isn’t feasible. Inline fans are installed in the ductwork and are ideal for larger spaces, as they can connect multiple rooms. Consider your specific needs and preferences when choosing the right type for your bathroom.
Gather Necessary Tools and Materials
Tools Needed for Installation
Before you begin the installation process, gather all necessary tools to ensure a smooth experience. You’ll need a drill, a screwdriver (both flathead and Phillips), a utility knife, wire strippers, a measuring tape, and a ladder or step stool. Having all these tools on hand will save you time and frustration during the installation.
Materials Required for Installation
In addition to the exhaust fan itself, you’ll need some materials to complete the installation. This includes electrical wire, a junction box, ducting (if required), duct tape, and screws or mounting brackets. Make sure to read the manufacturer’s instructions for specific materials needed for your chosen fan model. Having everything ready before you start will help streamline the process.
Safety Precautions Before You Start
Turn Off Power to the Bathroom
Safety should always be your top priority when working with electrical components. Before you begin, turn off the power to your bathroom at the circuit breaker. This precaution will help prevent any accidental electrocution while you’re working on the fan installation. Use a voltage tester to ensure that the power is completely off before proceeding.
Use Safety Gear
Wearing appropriate safety gear is also essential during this project. Consider using safety glasses to protect your eyes from dust and debris, and wear gloves to safeguard your hands from sharp edges and electrical wires. If you’ll be working at heights, ensure that your ladder is stable and positioned correctly to prevent falls.
Removing the Old Fan (If Applicable)
Disconnecting Power and Removing Fixtures
If you are replacing an old exhaust fan, start by turning off the power and removing any light fixtures connected to the fan. Depending on the model, you may need to unscrew or unclip the light fixture to access the fan. Carefully detach the wiring from the old fan and set the fixture aside for later reinstallation, if applicable.
Unscrewing the Old Fan
Once the power is disconnected and the light fixture is removed, locate the screws securing the old fan to the ceiling or wall. Use your screwdriver to remove these screws, and gently pull the fan away from its housing. Be cautious not to damage the surrounding drywall during this process. After removing the old fan, inspect the area for any signs of damage or mold that may require attention.
Preparing the Installation Site
Measuring and Marking the Location
Before installing the new exhaust fan, you must prepare the installation site. Use a measuring tape to determine the best location for the fan; ideally, it should be placed near the shower or bathtub to effectively capture moisture. Mark the center point where the fan will be installed. Ensure that there is enough clearance above the fan for proper installation and airflow.
Cutting the Hole for the Fan
Using a utility knife or drywall saw, carefully cut a hole in the drywall based on the dimensions provided by the manufacturer. Take your time with this step to ensure a clean cut, as uneven edges can lead to issues during installation. If your fan requires ducting, also consider cutting a hole in the exterior wall for venting.
Wiring the Exhaust Fan
Understanding Electrical Connections
With the site prepared, it’s time to handle the electrical wiring. Before proceeding, familiarize yourself with the electrical connections outlined in the manufacturer’s instructions. Most exhaust fans will have three wires: black (hot), white (neutral), and green or bare (ground). Knowing how to connect these wires properly is crucial for safe and efficient operation.
Connecting the Wires
Begin by connecting the ground wire to the grounding screw in the electrical box. Next, connect the black wire from the fan to the black wire in the ceiling using wire connectors. Follow this with the white wire connection. Ensure that each connection is secure and properly insulated to prevent any electrical hazards. Once the wiring is complete, push the wires back into the electrical box and secure the fan in place.
Installing the Exhaust Fan
Mounting the Fan to the Ceiling or Wall
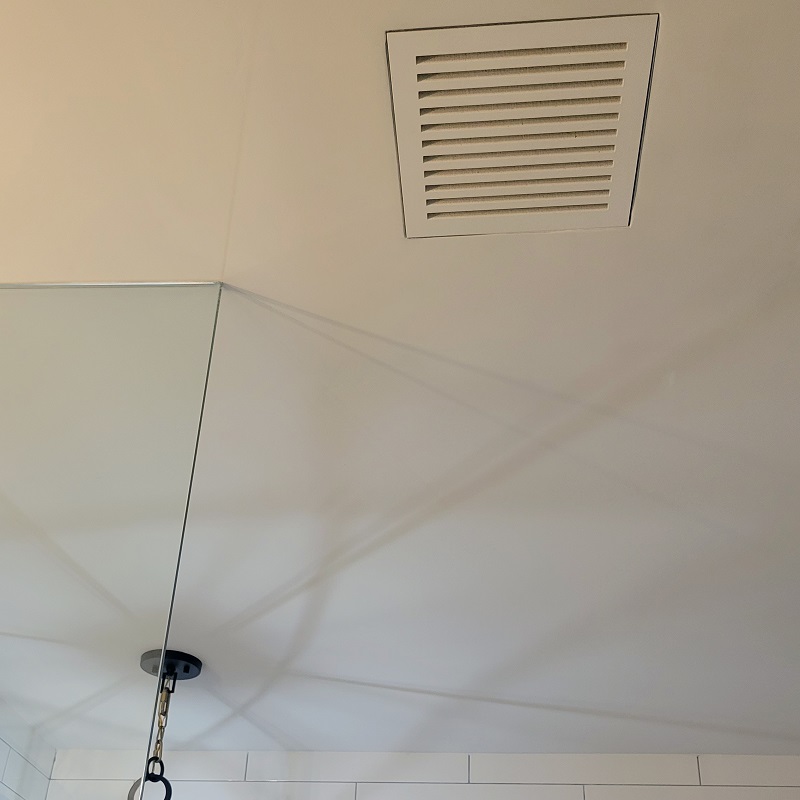
With the wiring completed, you can now install the exhaust fan. Align the fan with the hole you cut earlier and secure it in place using the screws provided by the manufacturer. Ensure that the fan is flush against the ceiling or wall, as any gaps can result in reduced efficiency and potential drafts.
Attaching the Ductwork
If your exhaust fan requires ducting, connect the ductwork to the fan’s exhaust port. Use duct tape to ensure a tight seal and prevent any leaks. This step is crucial for directing moist air outside your home effectively. If you are venting through the roof or wall, ensure that the ducting is angled downward toward the exit to facilitate proper airflow.
Testing the Exhaust Fan
Turning the Power Back On
Once the fan is securely mounted and connected, it’s time to test the installation. Return to the circuit breaker and turn the power back on. Carefully check the fan to ensure it operates correctly. Listen for any unusual noises and observe whether the fan runs smoothly.
Checking Airflow and Functionality
To confirm that the fan is functioning properly, hold a piece of tissue or lightweight paper near the fan’s intake. The paper should be drawn toward the fan, indicating that airflow is moving effectively. If the fan does not seem to be drawing air, double-check your connections and ensure that there are no obstructions in the ductwork.
Final Touches and Maintenance
Reinstalling Light Fixtures
After confirming that the exhaust fan is working correctly, you can reinstall any light fixtures that were removed earlier. Follow the same steps you took during disassembly, ensuring that all electrical connections are secure. Once the fixtures are back in place, turn the power back on and test the lights to ensure they function properly.
Conclusion: Enjoying a Fresh Bathroom Environment
The Benefits of a Properly Installed Exhaust Fan
Congratulations! You’ve successfully installed an exhaust fan in your bathroom. With this new addition, you can enjoy improved air quality, reduced humidity, and a fresher environment. A well-ventilated bathroom not only enhances comfort but also protects your home from moisture-related damage.
Next Steps in Home Improvement
As you take pride in your newly installed exhaust fan, consider other home improvement projects that can further enhance your living space. Whether it’s upgrading fixtures, improving insulation, or tackling other ventilation needs, each project contributes to a healthier and more enjoyable home environment. Embrace the journey of home improvement and enjoy the benefits of a well-maintained living space.