
Introduction to Bathtub Spouts
Bathtub spouts are essential components of any bathroom, responsible for delivering water into your tub for bathing. Over time, these spouts may need replacement due to wear and tear, leaks, or simply to upgrade to a more modern style. Removing a bathtub spout is generally a straightforward process that can be accomplished with basic tools and a systematic approach. In this guide, we’ll walk through the easy steps required to remove a bathtub spout, ensuring you can tackle this DIY project confidently and effectively.
Assessing the Type of Bathtub Spout
Before beginning the removal process, it’s important to identify the type of bathtub spout you have. There are typically two common types: screw-on spouts and slip-on spouts. Screw-on spouts are secured to the plumbing pipe with a threaded connection, while slip-on spouts slide onto a copper or brass pipe and are secured with a set screw underneath. Determining the type of spout you have will dictate the specific removal method you need to follow, ensuring you approach the task correctly and avoid potential complications during the removal process.
Gathering the Necessary Tools and Materials
To successfully remove a bathtub spout, gather the essential tools and materials beforehand. You will typically need an adjustable wrench or a set of wrenches suitable for plumbing fittings, such as a pipe wrench or channel-lock pliers. Additionally, having a screwdriver (flathead or Phillips, depending on your spout type), penetrating oil or WD-40 for loosening stubborn connections, and possibly plumber’s tape for reinstallation can be helpful. Ensure you have adequate lighting and workspace around the bathtub area to comfortably maneuver and access the spout during the removal process.
Preparing the Work Area
Prepare the bathtub area by ensuring it is clean and free from any obstacles that may hinder your work. Lay down a towel or old cloth to protect the bathtub surface from scratches or damage that may occur during the removal process. If necessary, use a flashlight or additional lighting to inspect the underside of the spout and plumbing connections more effectively. Adequate preparation of the work area contributes to a smoother removal process and helps maintain the integrity of your bathroom fixtures.
Turning Off the Water Supply
Before removing the bathtub spout, it’s crucial to turn off the water supply to prevent any accidental leaks or water damage. Locate the shut-off valves for the bathtub’s water supply and turn them clockwise to close them completely. Test the water faucets in the bathtub to ensure that no water is flowing through the spout. This step is essential for your safety and to prevent unnecessary water wastage or potential flooding while you work on removing the spout.
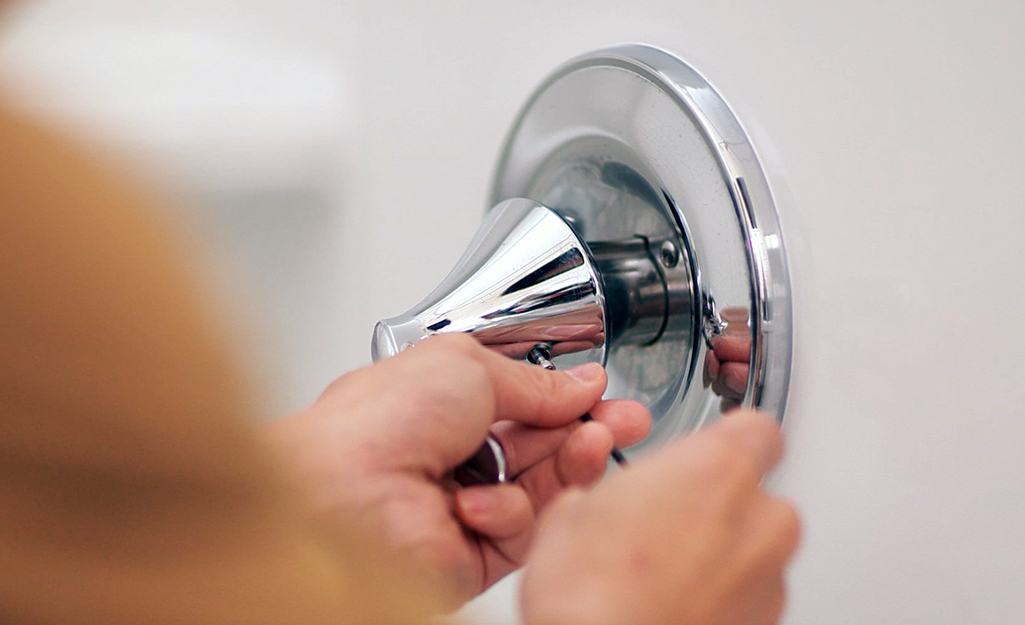
Removing a Screw-On Bathtub Spout
If you have identified that your bathtub spout is a screw-on type, follow these steps to remove it:
- Locate and Loosen the Set Screw: Use a screwdriver to locate and loosen the set screw located on the underside of the spout near the wall. This set screw may be concealed under a decorative cap or cover plate, which can be gently pried off using a flathead screwdriver if necessary.
- Unscrew the Bathtub Spout: Once the set screw is loosened, use an adjustable wrench or appropriate plumbing wrench to grip the base of the spout near the wall. Rotate the spout counterclockwise to unscrew it from the threaded pipe. Apply gentle but firm pressure to break any sealant or corrosion that may have formed over time.
- Inspect and Clean the Pipe: After removing the spout, inspect the threaded pipe protruding from the wall for any signs of damage, corrosion, or mineral buildup. Clean the pipe threads using a wire brush or a cloth to ensure a smooth surface for installing the new spout.
- Prepare for Reinstallation: If you are replacing the spout, apply plumber’s tape (Teflon tape) to the threads of the pipe to create a tight seal when installing the new spout. Wrap the tape clockwise around the threads to prevent it from unraveling when screwing on the new spout.

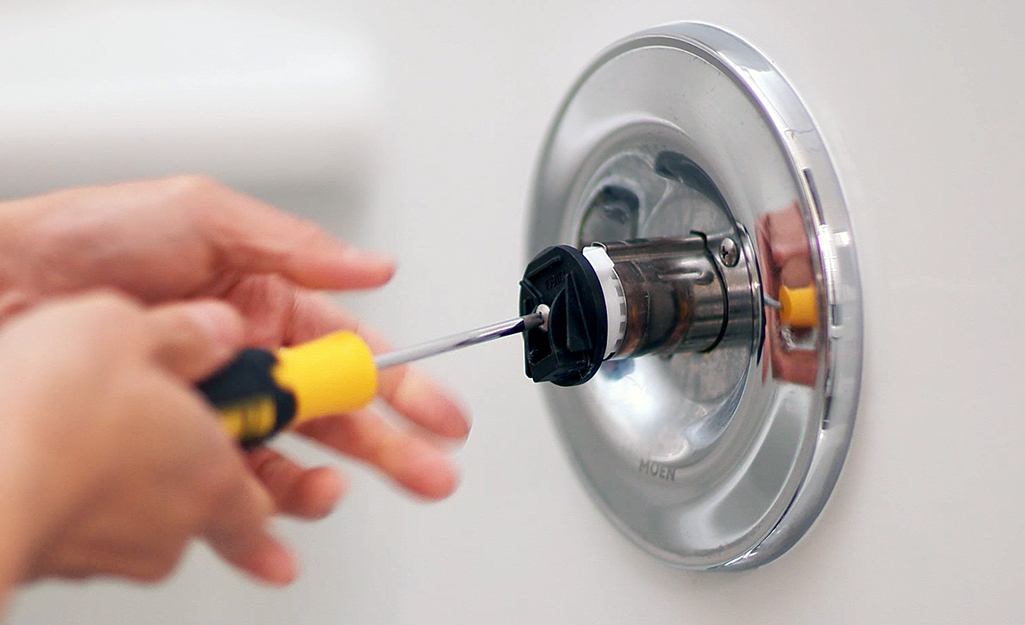
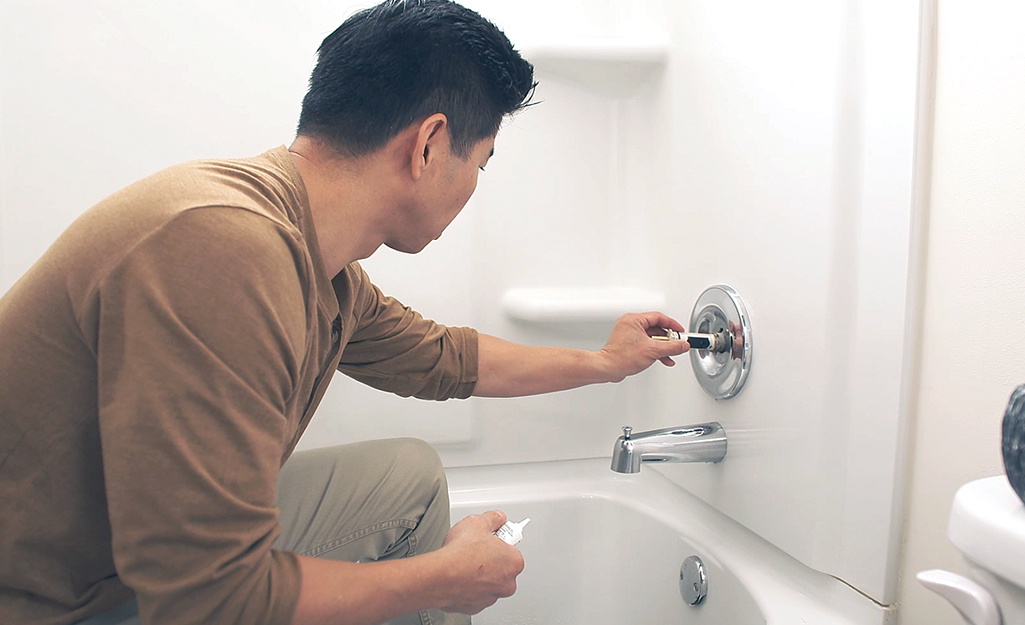
Removing a Slip-On Bathtub Spout
For slip-on bathtub spouts, follow these steps to remove it:
- Locate the Set Screw: Look for the set screw on the underside of the spout near the wall. This screw is typically located within a small hole or indentation and may require a hex key or Allen wrench to loosen it.
- Loosen and Slide Off the Spout: Once the set screw is loosened, gently pull the spout away from the wall. Use caution to avoid damaging the pipe or surrounding tiles. The spout should slide off the copper or brass pipe with minimal effort once the set screw is completely loosened.
- Inspect the Pipe and Clean: After removing the spout, inspect the end of the copper or brass pipe for any corrosion, mineral deposits, or damage. Clean the pipe surface using a wire brush or a soft cloth to ensure a clean and smooth installation surface for the new spout.
- Prepare for Reinstallation: If you are replacing the spout, clean the interior of the new spout and apply plumber’s tape (Teflon tape) to the outside of the pipe end. This tape helps create a watertight seal and prevents leaks when the new spout is slid back onto the pipe.

Troubleshooting and Considerations
During the removal process, you may encounter challenges such as stubborn set screws, corroded connections, or difficulty accessing the spout due to surrounding fixtures or tight spaces. In such cases, applying penetrating oil or WD-40 to stubborn screws or fittings can help loosen them. Use caution and avoid excessive force to prevent damaging plumbing components or causing leaks that may require professional repairs.
Conclusion
Removing a bathtub spout is a manageable DIY project that can be completed with basic tools and careful attention to detail. By following the easy steps outlined in this guide, you can safely remove an old or malfunctioning bathtub spout and prepare for its replacement with minimal hassle. Whether you are upgrading to a new spout for aesthetic reasons or addressing issues such as leaks or corrosion, understanding the type of spout you have and the appropriate removal method ensures a successful outcome. With the right tools, preparation, and methodical approach, you can confidently tackle this home improvement task and maintain the functionality and appearance of your bathroom fixtures.